[Photographs: Vicky Wasik. Video: Natalie Holt.]
Let’s get this out of the way up front: the most authentic part of this recipe is my reasonably Italian sounding name. The history of cannoli is steeped in more regional ingredients, cooking traditions, and family secrets than I could ever hope to honor, much less integrate, in a single recipe. The best I can do is take the same approach I use in developing copycat recipes like homemade Oreo-style cookies and Fig Newtons—focus on capturing the taste, texture, and appearance we long for, even when that means breaking certain rules along the way.
Which is to say, my recipe itself may aim to create the Platonic ideal of cannoli, but there’s nothing traditional about what it looks like on paper. My pastry shells don’t contain a single drop of Marsala or any eggs at all, but they’re blistered, crisp, and tender, and almost savory in their toastiness. My ricotta filling doesn’t include even a pinch of powdered sugar, but it’s wonderfully sweet and silky smooth. The two unite in a pastry that’s rich and light, creamy and crunchy, earthy and floral, mellow and intense—a study in contrast if there ever was one. It takes some time, and an arsenal of equipment to pull off, but the results are more than worth the effort.

Of course, it all starts with the right dough. Believe it or not, cannoli shells are really a type of cracker—nothing more than flour, water, salt, and a knob of butter. Many classic Italian recipes use Marsala as some of that liquid, not for flavor but for the same reason Kenji puts vodka in pie dough—to provide hydration while limiting gluten development.
Good quality Marsala can be hard to find here in the States, and it’s an expensive purchase for recipes that only call for a tablespoon. The far easier method for controlling gluten development is to choose a low-protein all-purpose flour such as Gold Medal or Pillsbury. This builds the right balance of starch and protein into the recipe from the start, giving the shells a perfect combination of tenderness and strength. Just toss all the ingredients into a food processor and blitz until satiny smooth and a little…cobwebby, for lack of a better term.

Hypothetically, this can be done by hand if you have the patience to slap and stretch the sticky dough for an hour, but it’s a 90-second job in a food processor—the only sane option so far as I’m concerned. Transfer the sticky dough to a lightly greased bowl, cover, and set it aside for at least two hours or up to 24. Either way, that flexibility leaves more than enough time to make the filling at your leisure, so don’t feel compelled to tackle the entire recipe, start to finish, in a single afternoon.
On that note, my take on the ricotta filling is certainly where this recipe deviates most from tradition. Virtually all cannoli recipes use nothing more than powdered sugar to thicken and sweeten the ricotta. It’s the easiest method for sure, but the undissolved starch from the powdered sugar leaves a chalky ghost in every bite. If the ricotta is anything less than spectacular, the result is a filling that tastes like, as Daniel once put it, caulk.
My solution is to make a small batch of vanilla pudding, providing a sweet, thick, creamy, and flavorful foundation for the ricotta filling (it’s the same trick I use for making a super-stable cream cheese buttercream). Once the vanilla pudding is cool, beat it until smooth and creamy (either with a flexible spatula or the paddle of a stand mixer), then fold in the ricotta by hand.

It should go without saying that the ricotta needs to be of a very high caliber. Anything made with gums, stabilizers, preservatives, or other additives should be rejected out of hand. If you’re lucky enough to live near an excellent producer, locally made ricotta is an extraordinary thing (at Serious Eats, we love Salvatore Bklyn and Di Palo’s). Shy of that, look for ricotta made with nothing more than milk or whey and possibly salt and/or an acid or starter of some sort (true ricotta is made from nothing more than whey, but it’s a rarity outside of Italy). Ricotta is the backbone of cannoli, and if it’s not delicious enough to eat by the spoonful, your cannoli will be doomed to mediocrity from the start.
After you’ve made the filling, transfer it to a large, disposable pastry bag fitted with a plain, 1/2-inch round tip and refrigerate until needed—it will keep up to 3 days, another excellent make-ahead option.
Next up: rolling the dough. It will seem impossibly sticky in the bowl, but all it needs is a generous coating of flour. Seriously, don’t be shy. Excess flour can be brushed off later, so use as much as you need to feel comfortable handling the sticky dough. Roll it until no more than 1/16 inch thick, then brush it lightly with egg white and fold it in half.

Like a poorly applied screen protector, this results in tons of little air pockets trapped between the layers. In turn, these pockets help the dough to blister in the hot oil, giving the shells a delicate honeycomb crunch and plenty of surface area to fry up golden brown. Re-roll the dough until it’s 1/16 inch thick once more, then cut as many 3 1/2–inch rounds as possible—the largest cutter in Ateco’s graduated set is perfect for the job.

Gather up all the scraps and transfer to an airtight container until you have the time and space to re-roll. While you prepare the oil for frying, the cutouts can be left as-is; if you think this will be longer than 20 minutes, cover them with plastic wrap or a clean towel to keep them from drying out.

The most important thing about cannoli, since it’s a deep fried pastry, is the oil itself—an ingredient most recipes leave to chance, as if any old oil will do. Nothing could be further from the truth; for cannoli, choosing the right oil is just as important as choosing the best ricotta. That’s because cannoli were traditionally fried in lard, a solid fat. Modern recipes use liquid oil for sheer convenience, and that’s a huge problem.
Pastries may crisp when fried in liquid oil, but the oil they absorbs will ultimately create a sense of greasiness. Imagine a piece of bread dunked in oil for a few minutes, and the way it would squish in your mouth. That’s nice if you’re talking about a chunk of focaccia dipped in a fine olive oil, but it’s not exactly what we look for in a pastry. When fried in solid fats, however, the oil a dough absorbs will revert to its solid state once cool, creating a texture that’s light and crisp, with lingering richness as the oil melts on your tongue, like a generously buttered slice of toast.
If you can find enough leaf lard to deep fry, go for it! But my favorite alternative is refined coconut oil. Like lard, it’s solid at room temperature and liquid when warm.
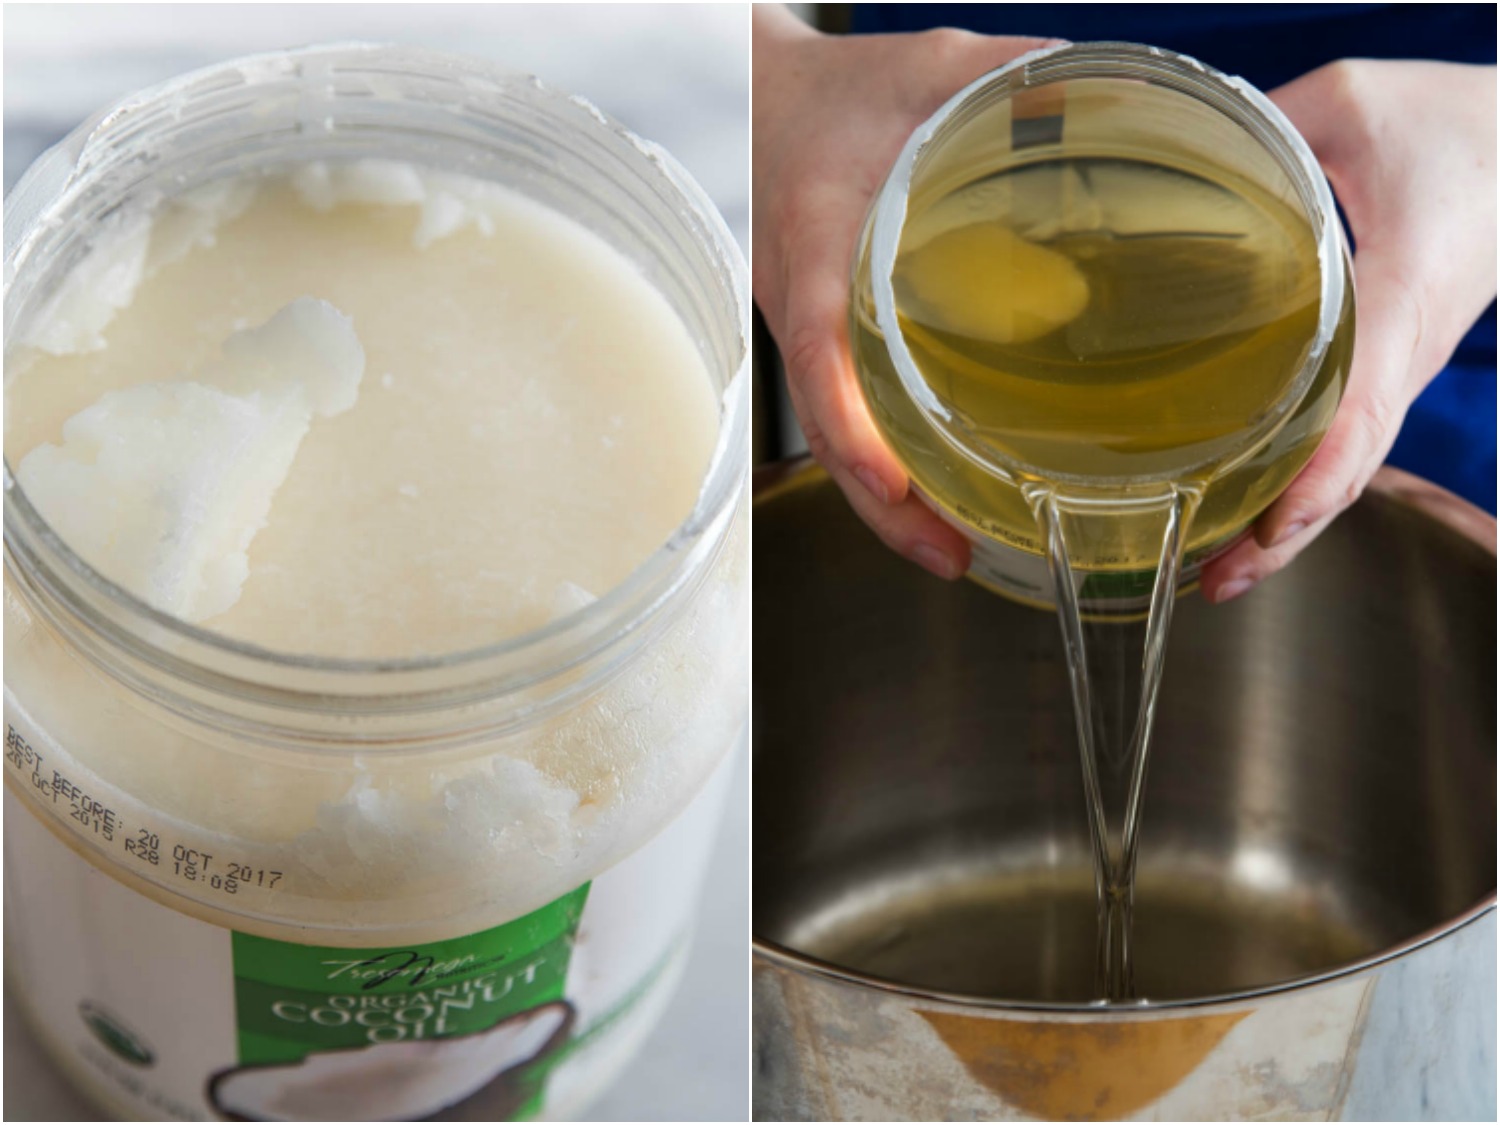
Even better, it doesn’t produce the funky smell most often associate with frying at home; in fact, it’s totally odorless, so the only the thing you’ll notice will be the aroma of the cannoli shells as they brown. Little jars of refined coconut oil can be pretty pricey in supermarkets, but when shopping in bulk at warehouse clubs or online, that price will drop to less than $3 a pound. If coconut oil isn’t an option due to allergies, other solid fats like palm oil or vegetable shortening will do just fine.
Whatever solid fat you choose, use enough to form a 2-inch deep layer in a pot that’s at least 4 inches deep, and warm it to about 360°F, using a clip-on digital thermometer to monitor the temperature in real time. Meanwhile, form the shells by wrapping the cut-outs around tapered cannoli forms and sealing the flap with a dab of egg white.
When the oil is ready, fry the shells until pale gold, about 2 minutes. If the time varies significantly for you, check the placement of your thermometer; it’s normal for the fry-time to vary a little depending on the specific thickness of the dough and the conductivity of the form, but any major differences are a sign the oil is too hot or too cool.
Transfer the fried shells to a paper towel–lined baking sheet. Holding the shell itself with a pair of kitchen tweezers or tongs, rap the tapered end of the form to loosen the shell. Set the forms aside until cool, then continue shaping and frying the remaining cutouts the same way.

Fried in a solid fat like refined coconut oil, the cannoli shells will keep up to one week in an airtight container. Once filled, that solid fat will act like a waterproof jacket and keep the filled cannoli crisp for about four hours. Still, I think cannoli are best when the shells are freshly fried and filled, perhaps because at that point I’ve been anticipating them all day.

I can’t argue with the allure of dark chocolate and toasted pistachios, but, to me, fresh cannoli are absolutely perfect on their own, delicate and crisp and creamy—just begging for a shot of espresso.

Source link