[Photographs: Vicky Wasik. Video: Serious Eats Team]
Imagine for a moment that you were tasked with writing down a detailed, step-by-step procedure for teaching someone how to tie a pair of shoelaces. The act itself is something people tend to master at an early age, to the extent that it’s second nature by the time they reach adulthood. So much so, it can feel impossible to put the process into words.
The more detail we put into the directions, the more needlessly complex it seems, yet simplification seems to strip away vital context, leaving the directions maddeningly vague. It’s an exercise that highlights the limitations of our language, proving that some things are easier done than said.
The same holds true for the simple art of making a parchment paper cone—a baker’s favorite tool for simple piping projects.

In many cases, a parchment cone is the sturdiest and most practical tool for the job. For example, when decorating a batch of frosted sugar cookies for the holidays, a baker may find that the number of icing colors required exceeds her supply of pastry bags. Or those bags may prove too large for such small quantities of frosting, especially with niche colors needed for only a single task—like the vibrant orange used to pipe a snowman’s carrot nose and nothing else.
Other times, a stiff frosting may risk blowing out the seams of a disposable piping bag or dislodging the piping tip, and so will necessitate the sturdiness of a parchment cone. In many cases, a parchment piping bag is simply the most convenient option—no piping tips to fuss with, nothing to wash up in the end. Making one is a skill well worth learning, even if that means rewatching the above video a few times. For those who do better with step-by-step written instructions, I’ve provided them below, along with photos to illustrate.
Whatever your style, the first thing you’ll need to do is grab a sheet of parchment. This technique will work with parchment of any size, resulting in piping bags as large or small as needed. That said, I most often start with an 18- by 13-inch sheet of parchment, as this is what I generally have on hand for lining my half-sheet pans.
How to Make a Paper Piping Bag, Step by Step
Step 1: Fold the Parchment and Cut
First, I fold the parchment in half diagonally, pressing firmly along the crease. I then rotate the parchment to align the crease with the edge of my work surface (be it a cutting board or a countertop), so that I can split the parchment along the seam with a chef’s knife, creating two right triangles.
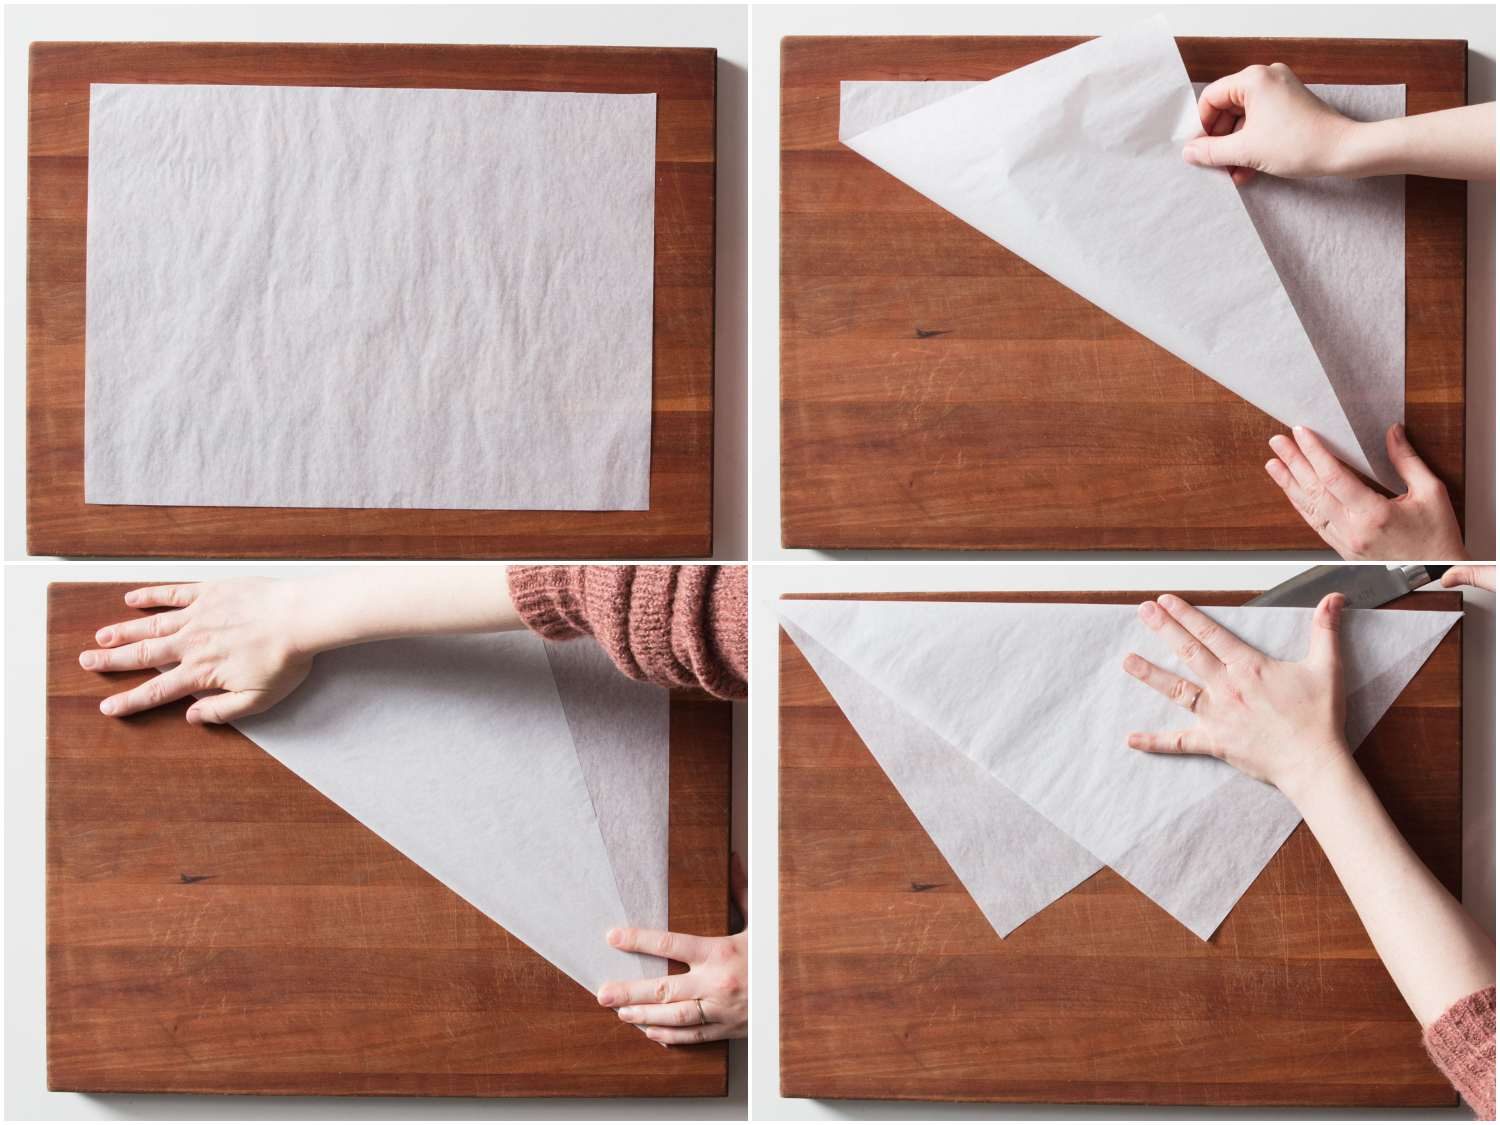
I orient one triangle so that its longest side runs parallel to my work surface, with the triangle’s 90° corner pointing toward me and its shortest side on my right. (For lefties, this whole procedure will be flipped.)
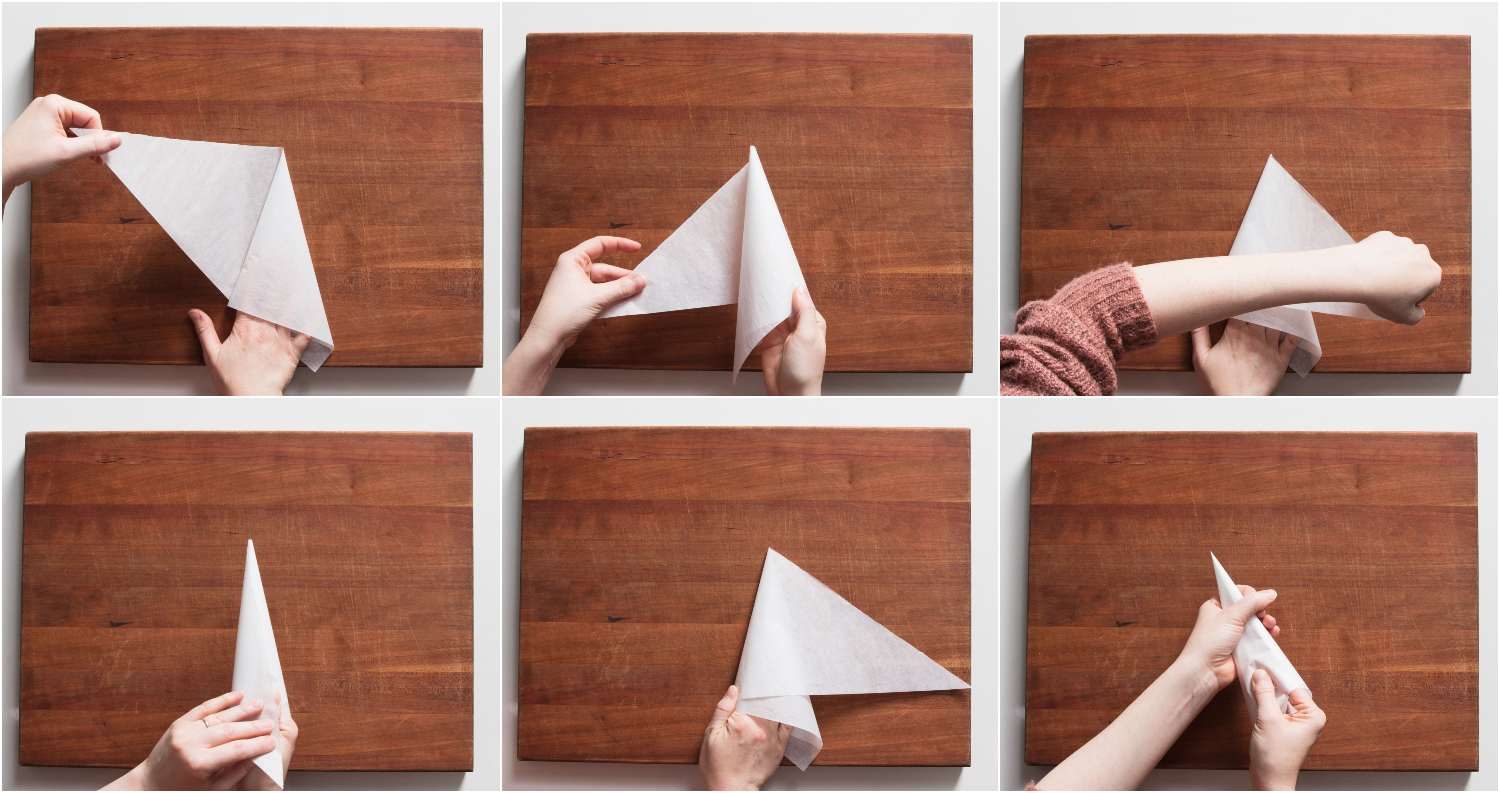
Step 2: Grab and Roll
With my palm facing up, I grab the far corner between my thumb and index finger, then roll my hand palm down, so that the parchment wraps itself around my fingers.

This leaves my hand palm down, with a flap of parchment beneath my fingers. By keeping pressure on this loose flap of parchment, I can then slide it toward my body, tightening the initially loose funnel shape into a closed cone.
Step 3: Slide to Form a Cone
At this stage, it really helps to just play around, letting the parchment slip and slide so you can see what sort of shapes and angles it can form. In the end, you want to drag the paper until it forms a tight cone; the body of the cone should lie more or less perpendicular to the longest side of the parchment triangle.
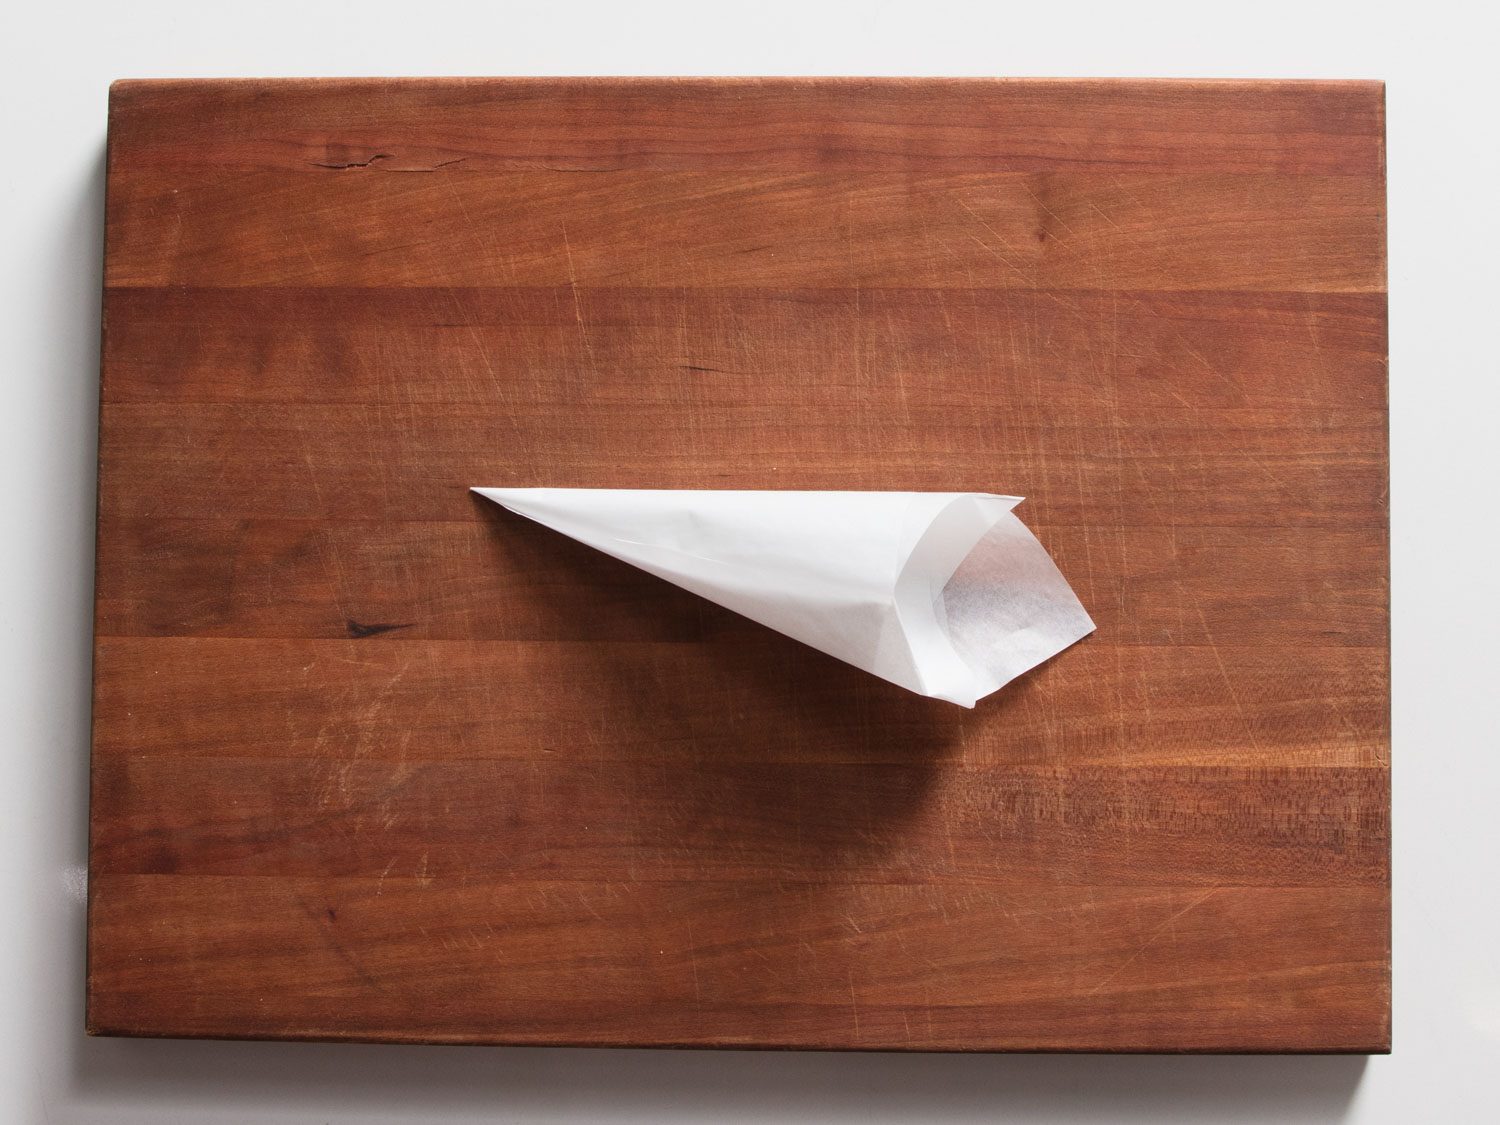
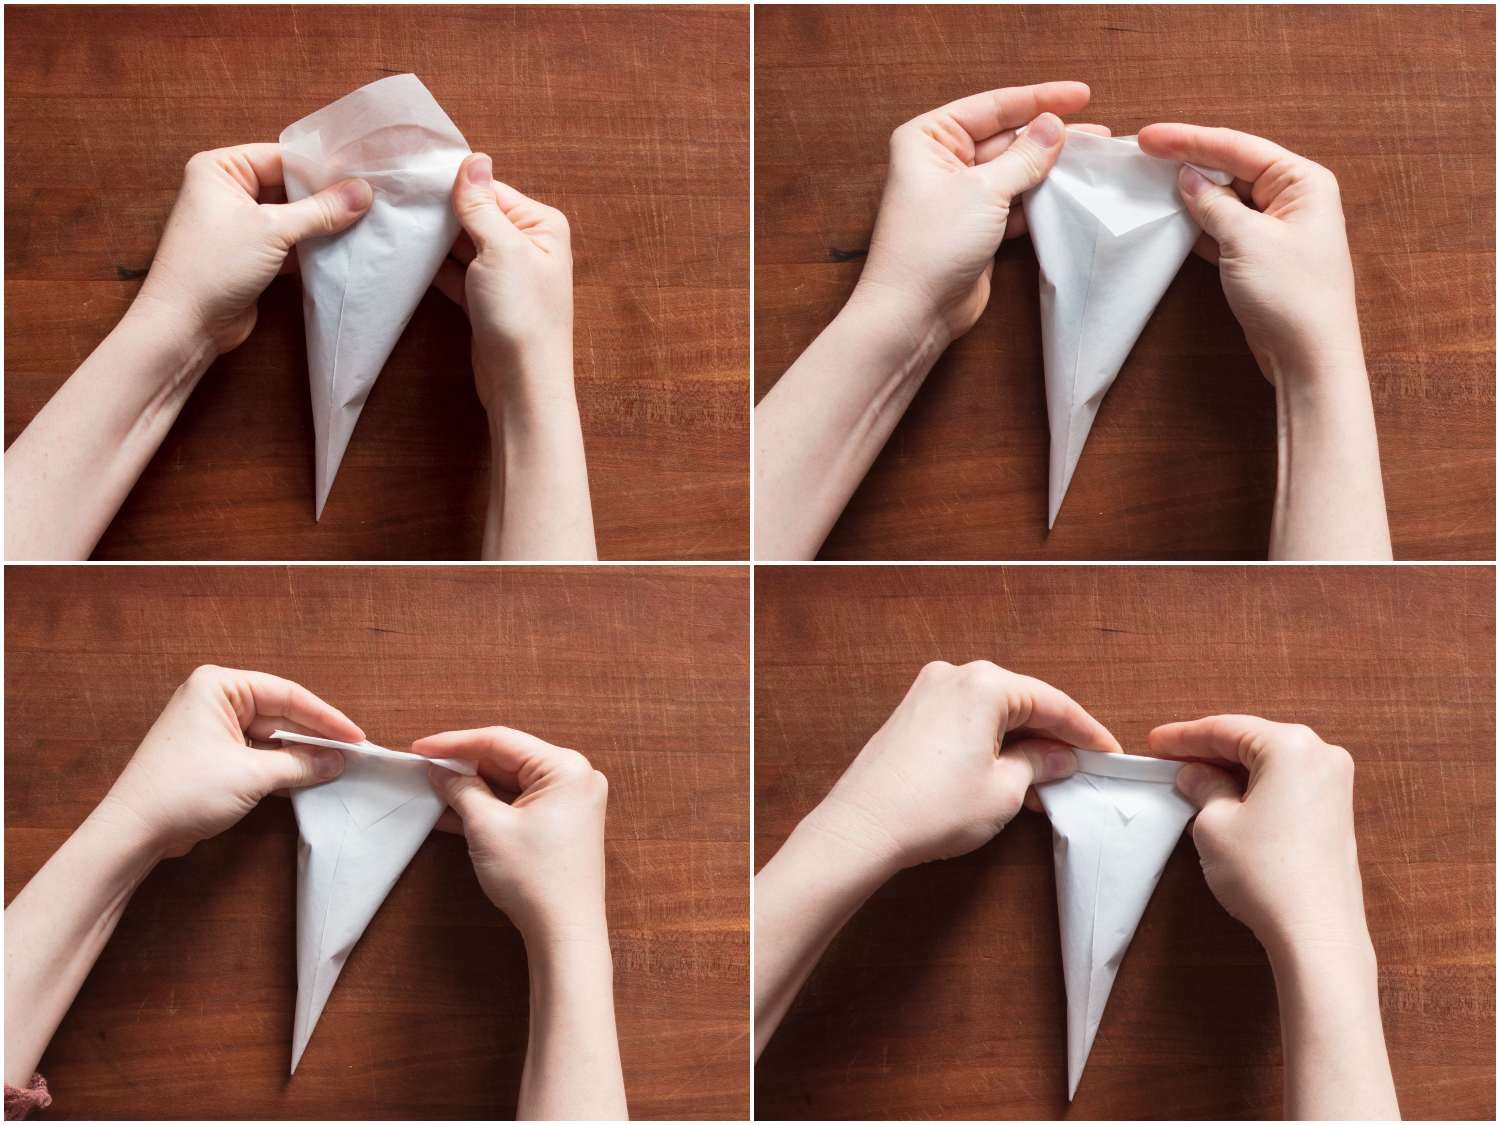
Step 4: Wrap the Extra Parchment Around and Tuck
While holding the cone in place with my right hand, I lift up the loose parchment on my left so that I can slide my thumb under the cone to pinch it in place. (In the photos below, I pinched the cone closed without moving my thumb underneath it—whoops!—but you can see this move clearly in the video, beginning at around 3:19.)
With the cone secured between my right thumb and index finger, I can use my left hand to wrap the extra parchment around the cone, until I have nothing left but a small flap that can be tucked into the body of the cone itself.
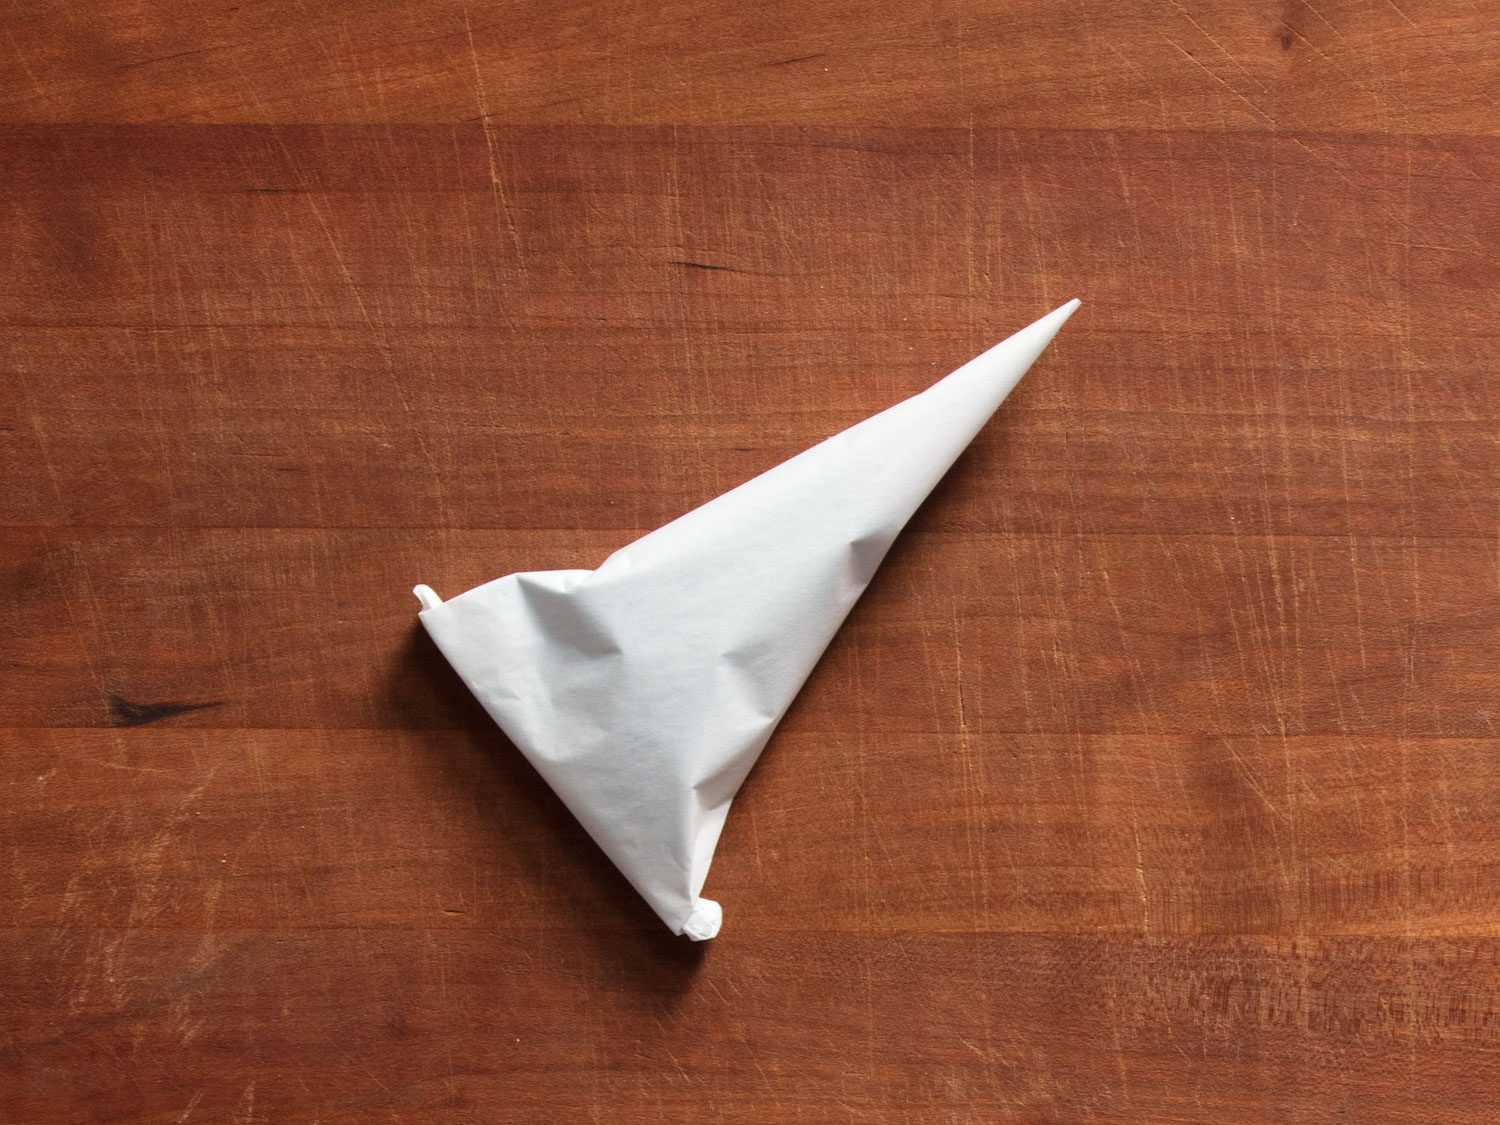
After those loose ends are tightly tucked away, I’m left with a self-supporting shape.
How to Use a Paper Piping Bag
The finished pastry cone will stand upright in an empty drinking glass, where it can easily be filled with chocolate, frosting, or whatever it is you need to pipe. Just don’t overdo it, and aim to stop when the bag is a little more than halfway full.

By leaving plenty of room to spare, I can fold down the excess paper at the end a few times, allowing me to securely close the bag.
I keep folding and creasing that excess until I can’t fold any more.
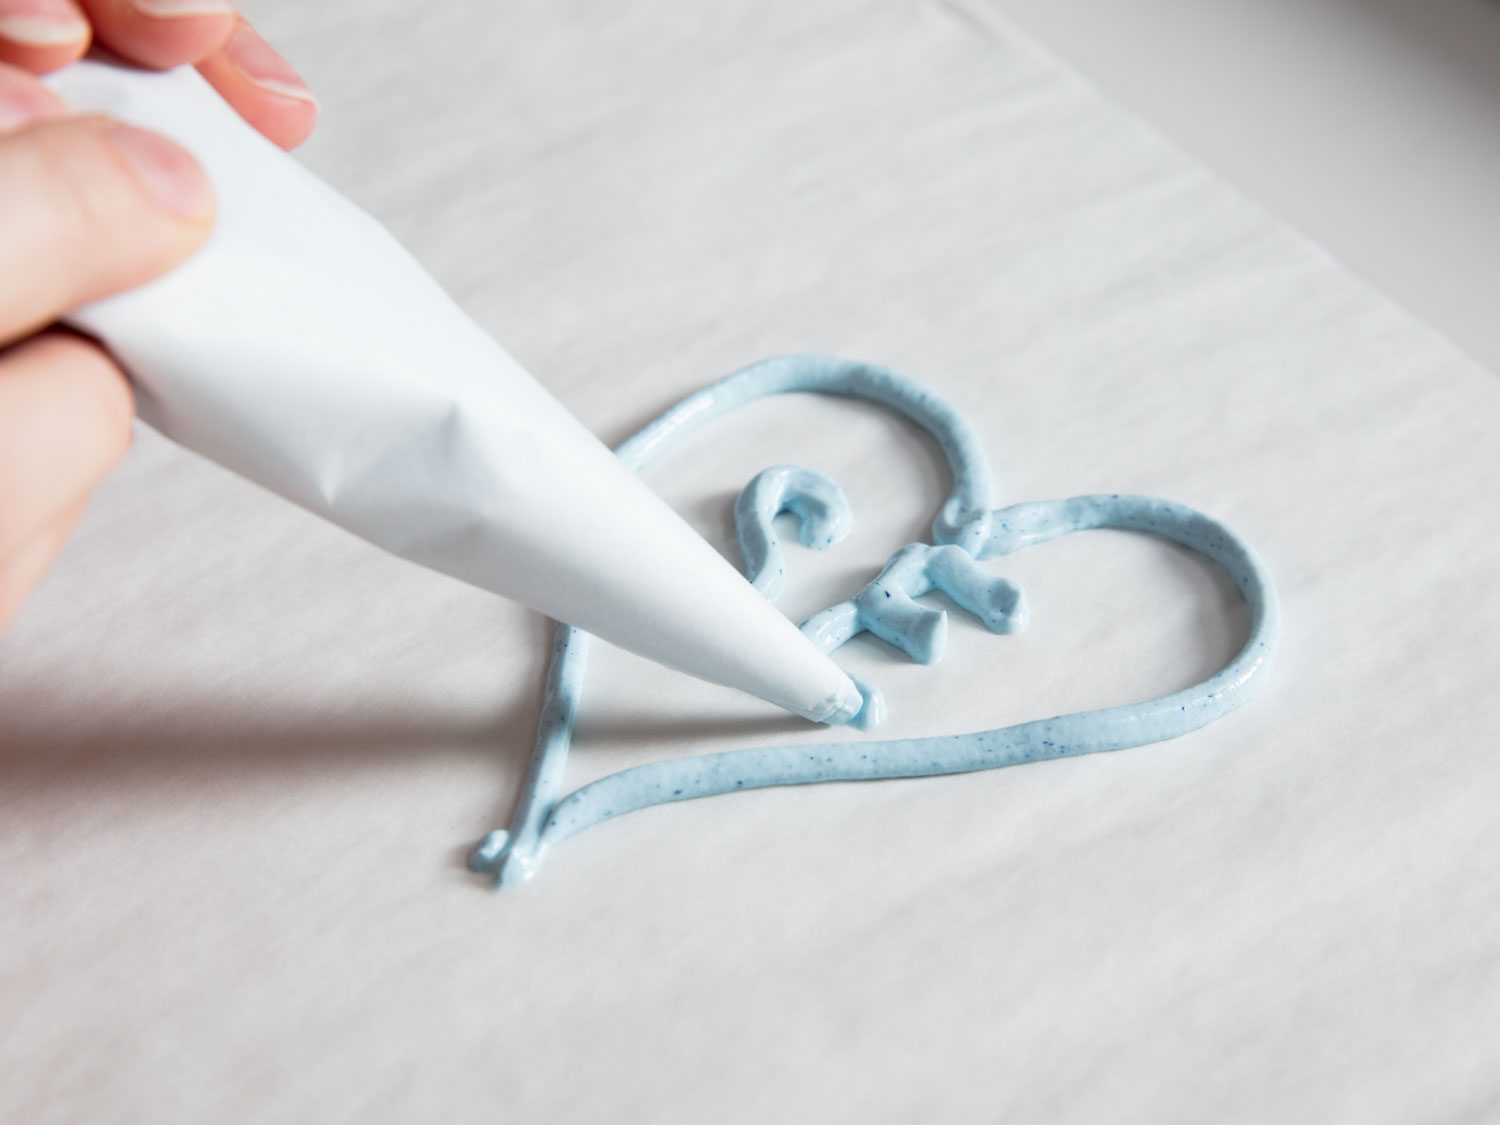
This creates a tight seal that holds the bag shut on its own, while also giving me a safe way to grip the bag. As I pipe, I’ll pause from time to time to fold the end down again as needed. Not to spark a debate, but think of it like a tube of toothpaste: It’s best squeezed from the end rather than the middle, and as the container empties, its excess material should be folded down to minimize waste.
Admittedly, none of this looks easy on paper!
Watch the video a few times. Use the photos for reference. Let the written instructions provide context at any confusing point. Ask a question below. But above all, give yourself permission to be unskilled at something you’ve never done. Skill can come only from practice, so the first few bags you roll will probably be a little loosey-goosey, but keep at it. For dedicated bakers, knowing how to make a parchment cone is an essential skill, a quick and easy alternative to a proper piping bag, whether it’s needed to scrawl “Happy Birthday” across the top of a celebratory cake or to squirt some cajeta between wafers for alfajores.
This post may contain links to Amazon or other partners; your purchases via these links can benefit Serious Eats. Read more about our affiliate linking policy.
Source link