
[Photographs: Vicky Wasik]
Whether you’re practicing a musical instrument, training for a sport, or cooking at home, speed is good. But problems crop up when people try to go faster than they can, or should. A music teacher of mine used to remind me constantly that I should never practice a piece faster than I was able to play it, since practicing errors would make them habitual. I’ve also seen a lot of people get injured in martial arts when they’ve tried to push their speed beyond their ability to control it. In cooking, no one wins when a recipe that requires long cooking is shoehorned into a sub-30-minute box.
One of the worst offenders are chili recipes. Too many versions involve quickly mixing beef, beans, and seasonings into a pot, simmering the mixture for 20 minutes, and calling it done. That’s not chili; it’s a bowl of slop masquerading as chili. Chili, like any meaty braise, requires a longer cooking time for the meat to tenderize, flavors to deepen and meld, and collagen to melt and thicken the sauce.
This doesn’t mean fast chili isn’t possible, though. As with sports and music, you just need the right tools and techniques in place to do it well. The solution in this case is to use a pressure cooker (that’s what your Instant Pot is, FYI).
Using a pressure cooker, you can sear the meat until well browned and sauté the onions until golden for more complex, layered flavor. After that, you can take advantage of the elevated pressure, and its corresponding elevated temperature, inside the cooker to tenderize the meat and break its natural collagen down into sauce-thickening gelatin in a fraction of the time. The results are worlds better than any of those other quick chili recipes out there.
I had clear goals when working on this recipe. First, I wanted this to be a beef-and-beans chili, not a Texas-style chili with no beans. We already have Kenji’s recipes on Serious Eats for Texas chili, both the slow-cooked kind and a pressure cooker version.
Second, I wanted it to be easy where it could be easy. That meant I’d use chili powder and other preground spices, not take the lengthy step of making a homemade spice mixture, or, even more labor-intensive, a from-scratch dried-chili purée (if you have the time for the purée, take a look at Kenji’s best chili ever article and recipe).
I also wanted the recipe to work whether you’re using dried beans you’ve cooked yourself or precooked ones out of a can. Just as importantly, I wanted it to be flexible enough to work for people who prefer their chili chunky as well as for those who like it with ground beef. This approach does it all.
But what I didn’t want was to cut corners that would lead to bland results. That meant taking the time to sear the meat properly, building in layers of flavor, and cooking the onions and other aromatics until browned and sweet.
Here are the basic steps.
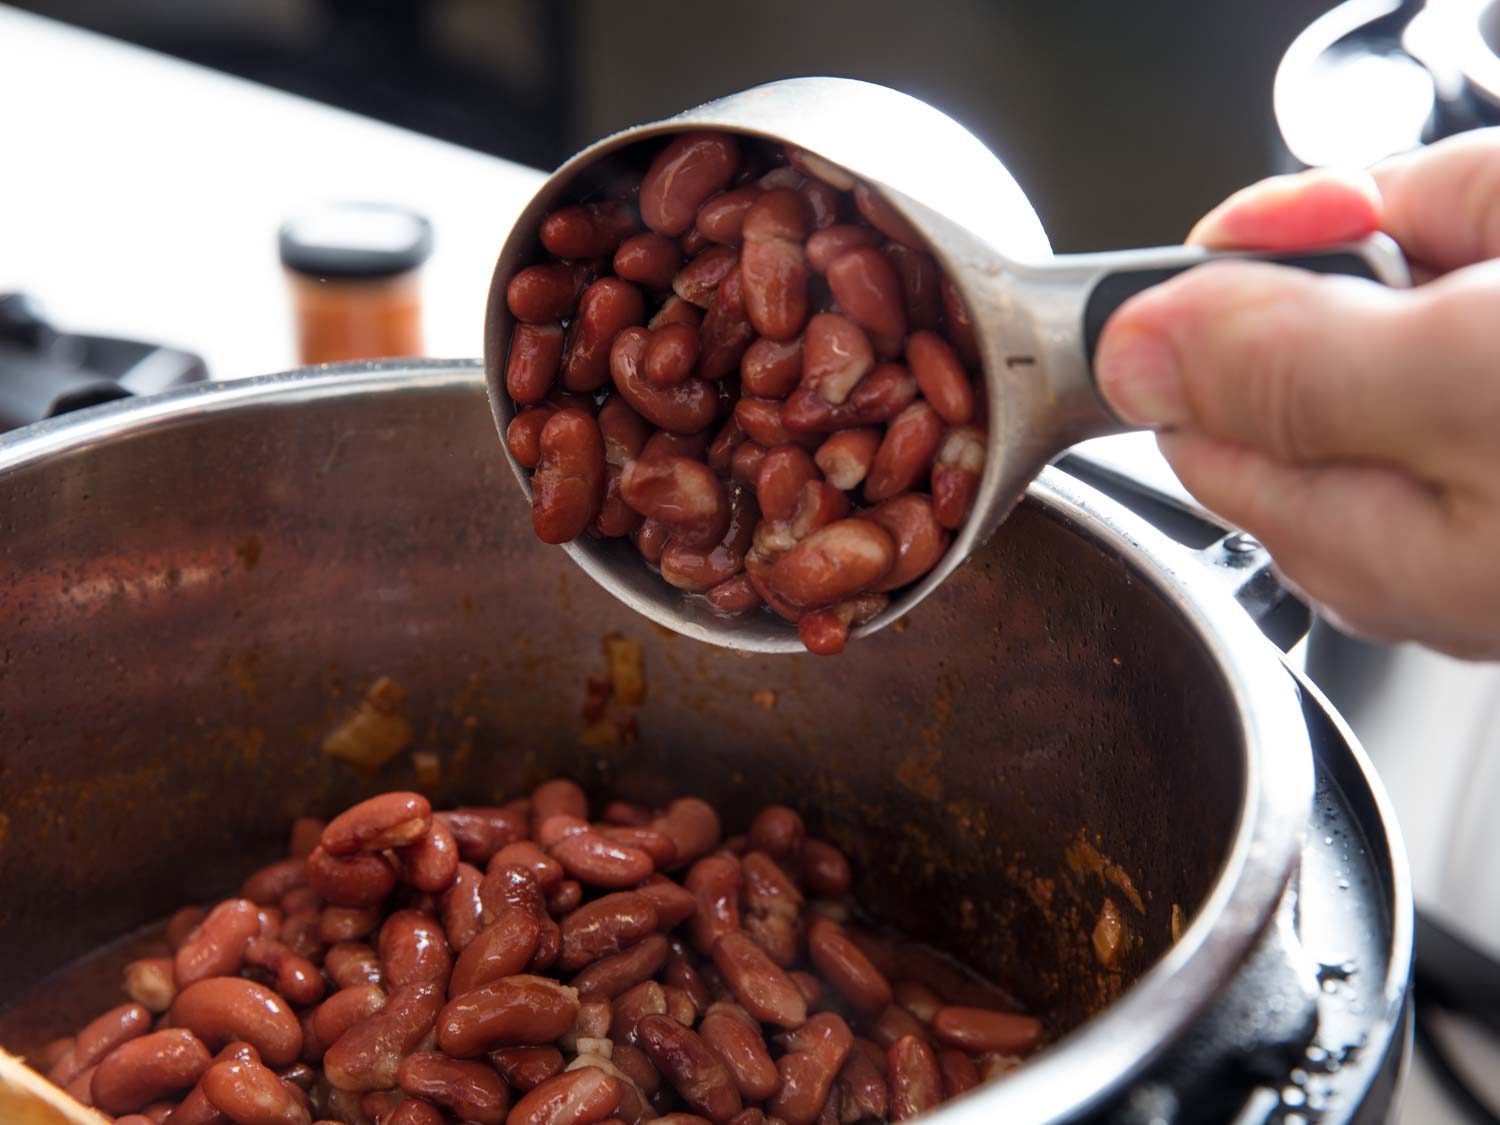
1. Cook the Beans (Optional)

If working with dried beans, you should start by cooking them. The pressure cooker does it quickly; without any presoak, you can cook kidney beans at high pressure in just 25 minutes (some sources give a shorter cooking time than this, but at shorter times, my beans were still hard).
Cooking beans quickly is one of the major selling points of a pressure cooker, but I’m not the biggest fan. Once sealed, the pressure cooker is a black box. You have no way of knowing what’s happening inside, whether the beans are done, or worse, overdone. And I can tell you from years of experience that dried beans do not have consistent cooking times. Depending on their age, the very same type of dried bean can cook at remarkably different rates, which is not a problem if you can pluck a bean from the pot from time to time to check on the progress, but it can be a big problem when those beans are locked inside a pressure cooker.
Fortunately, it isn’t as critical to nail absolutely perfect doneness for the beans in chili. Tender throughout but not falling apart may be ideal, and underdone beans certainly aren’t good, but ones that are slightly overcooked are fine; they’ll just mash a bit into the chili, which I like (far better than slightly firm whole beans studded throughout).
Cooked-from-dried beans will always taste better than canned ones, especially if you add aromatics like onion, garlic, and herbs to the cooking water. In more bean-forward dishes, I won’t use canned beans because I’m a snob. But in the case of chili, canned aren’t much of a concession—the chili itself is so full flavored that slightly inferior canned beans won’t harm it.
2. Brown the Beef
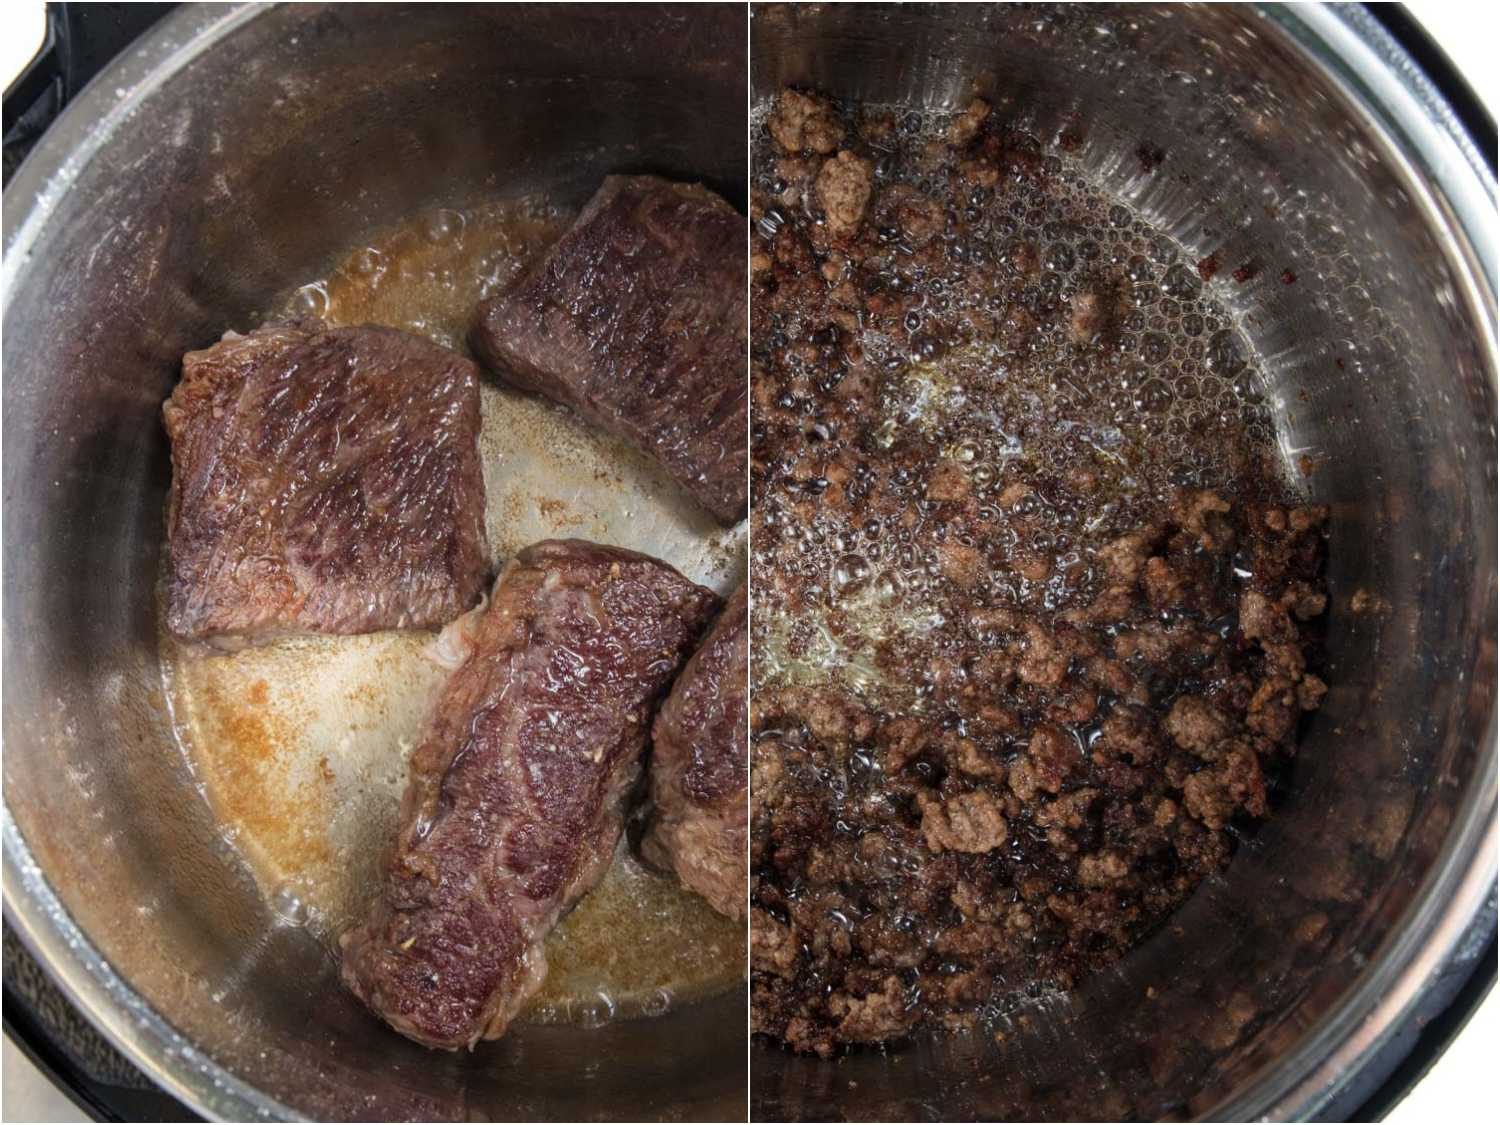
Browning the meat is one of the critical steps to any well-made stew or braise, which is what chili is. As we’ve seen before in our Stew Science series, browning is a double-edged sword. It builds necessary rich and roasty flavors via the complex Maillard reaction. But it also dehydrates the meat, making it dry and tough. The solution is to only brown a portion of the meat, which gets us those flavors while leaving plenty of the remaining meat tender.
As I mentioned above, I designed this recipe to work for both a chunky chili made from larger pieces of beef as well as with ground beef. How we accomplish this partial browning depends on what kind of beef we’re using.
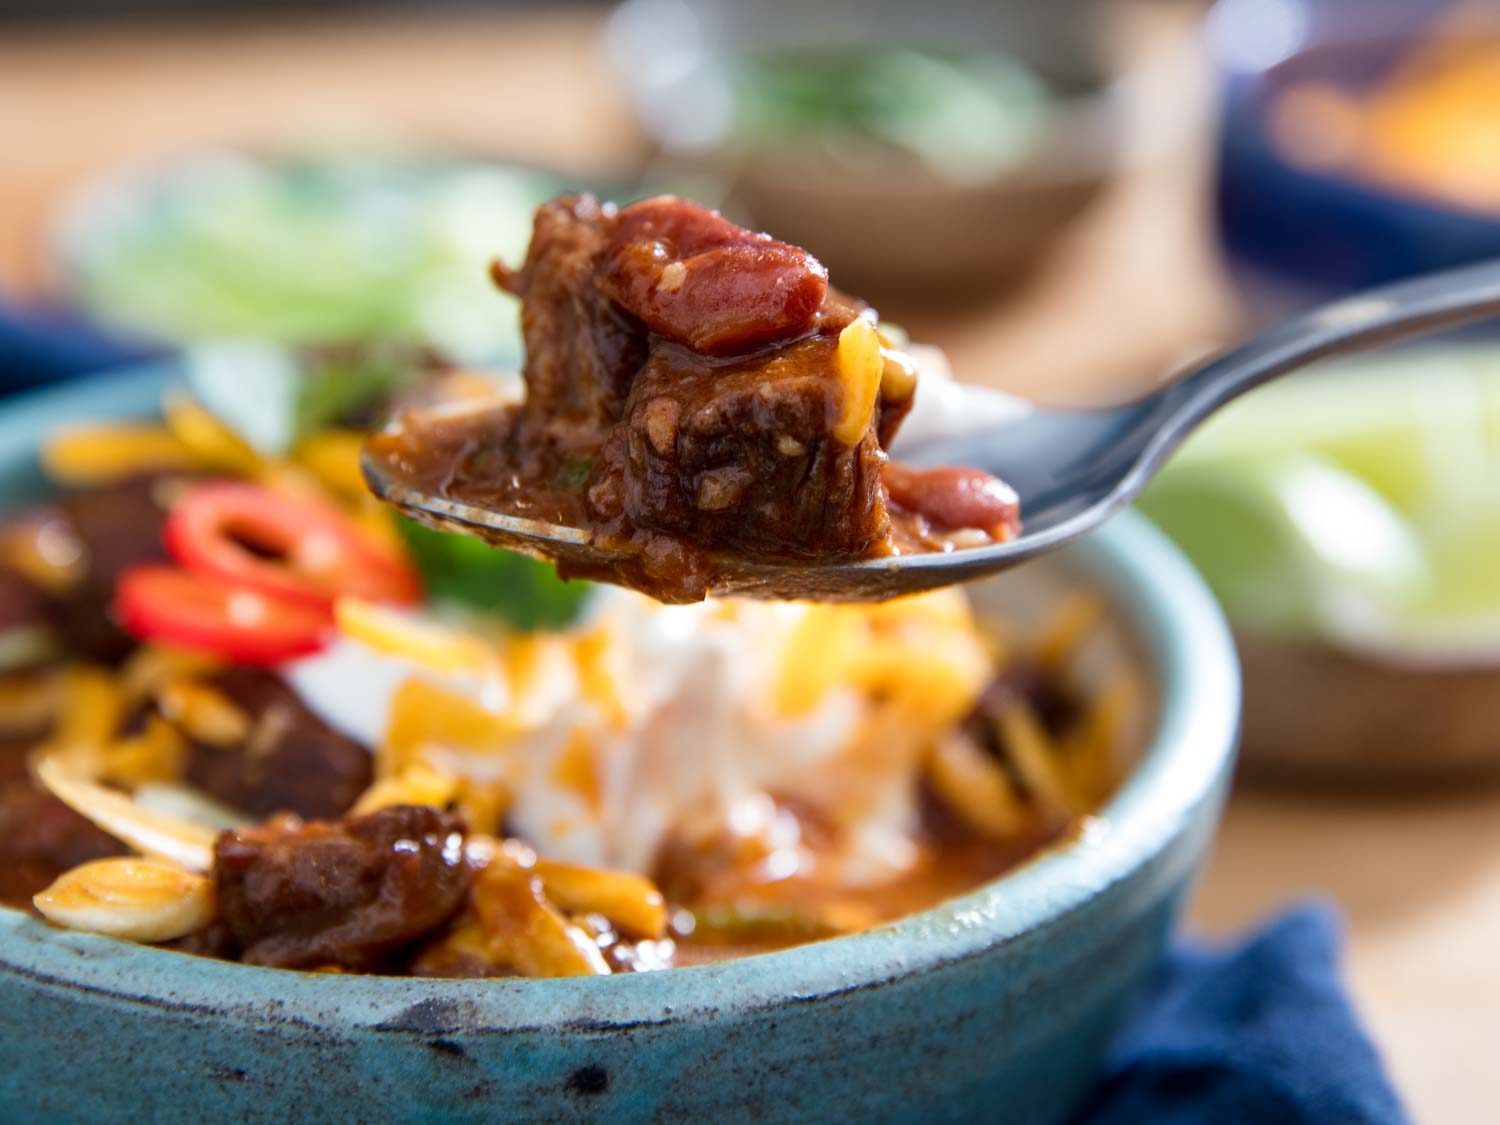
If you’re making a chunky chili, you should start with some nice slabs of boneless beef from a tough cut that does well with long cooking. One of my favorites for this is boneless beef short rib. Brown those slabs as is, then cut them up into smaller chunks after. That gives you plenty of browned flavor while leaving lots of unbrowned surface area that will guarantee tenderness later.
If you’re making a ground beef chili, brown just a portion of the ground beef—about a third or quarter of it. Those bits will grow dark and flavorful but also dry. The remaining unbrowned ground beef will deliver all the tenderness your chili needs.
3. Cook the Aromatics
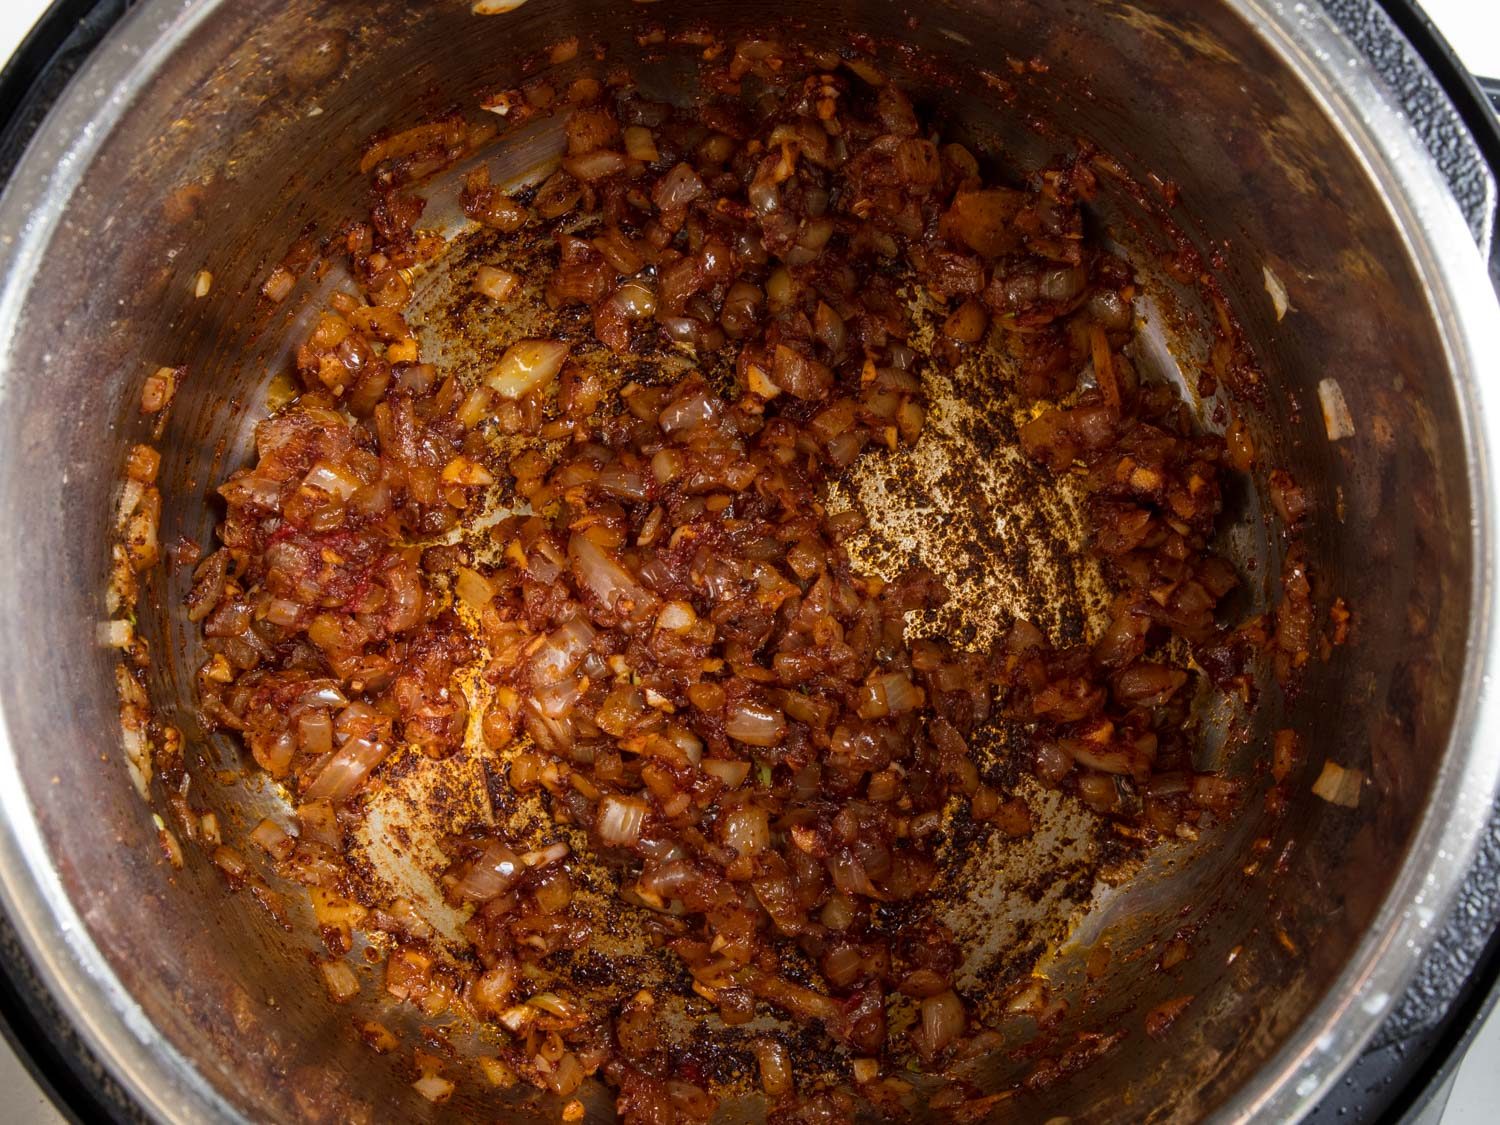
Once the beef is browned, I remove it from the pot and set it aside. Then I sauté the onions until golden, scraping up any browned bits of meat in the process. Next I add minced garlic (add it earlier with the onion, and you risk it scorching in the heat), along with a host of ground spices. I keep it simple, with a good dose of chili powder, onion and garlic powders, and cayenne pepper. Adding those spices at this early point will bloom them in the fat that the onions have been cooking in, releasing their fat-soluble flavors and aromas and gently toasting them for more depth.
After that, I mix in some tomato paste and sauté it for a minute to develop its flavor.
4. Add Remaining Ingredients and Pressure Cook

Now it’s time to get the braise going. I add the beef and any accumulated juices back to the cooker, followed by canned whole peeled tomatoes, which I’ve crushed by hand and strained of most of their juices. This is important. I wouldn’t normally discard the juices from canned tomatoes, since they have plenty of flavor of their own, but in a pressure cooker I can’t count on the evaporation of liquids as I can with a traditional long-cooked stew or braise. One of the keys to transposing recipes to the pressure cooker is reducing the amount of liquid so that the results don’t end up too soupy. The tomato juices are one of the only levers at my disposal, so they stay out (keep them, though, just in case you want to loosen your chili a little after it’s cooked).
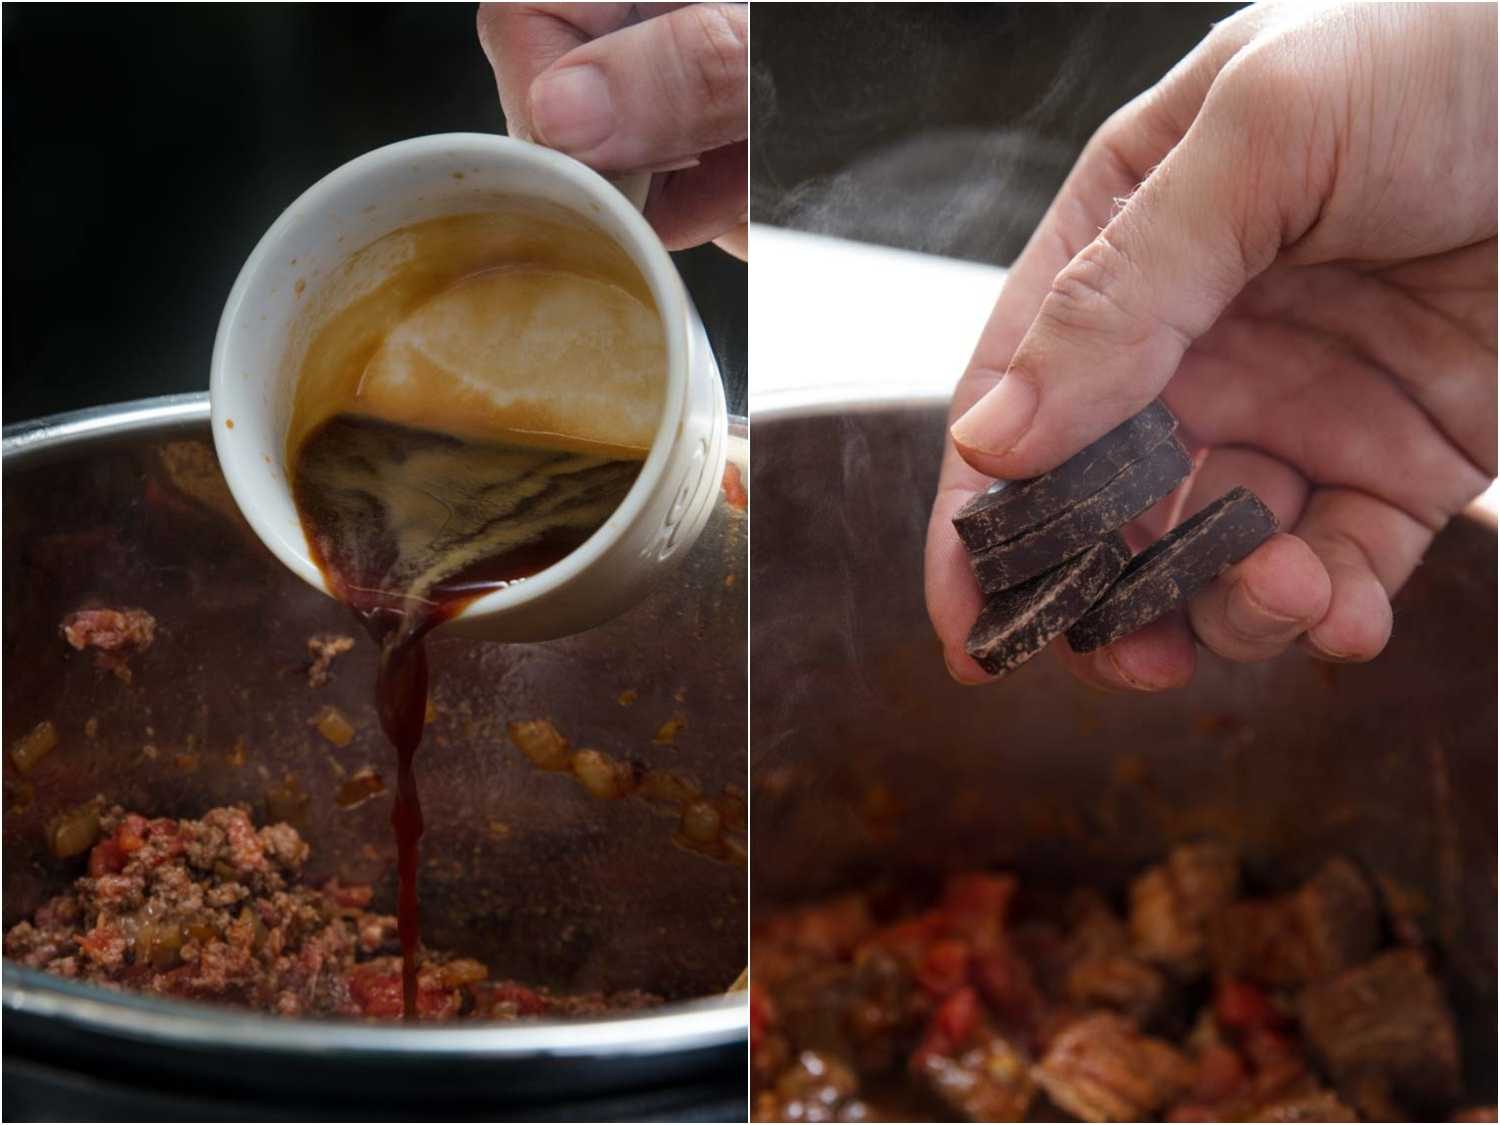
A couple other flavor-building ingredients go in as well. One is a shot of dark coffee, one is dark chocolate, and one is a splash of fish sauce. You will not taste any of these ingredients clearly in the final chili, but each adds something important. The coffee and chocolate, both darkly roasted ingredients, add more of that Maillard complexity to the chili; the chocolate, thanks to its cocoa butter content, also gives a subtle glossy silkiness to the liquids in the pot. The fish sauce, an umami bomb, lays down strong savory notes. You could just as easily hit it with a splash of Worcestershire sauce, Marmite, or even soy sauce for similar effect.
A bay leaf, meanwhile, lends a warm herbal aroma.
Now it’s time to seal the cooker. I run it at high pressure for just 20 minutes if using ground beef, and 35 minutes if using the chunks of short rib.
5. Finish
When the timer goes off, I quick-release the cooker’s pressure, then finish the chili. Give it a good stir, letting it simmer a little longer with the lid off if it needs to thicken up at all. Or add a splash of reserved canned tomato juices (or bean-cooking liquid) if it needs to be thinned a little.
Season it with salt and plenty of fresh black pepper. Add those beans, and let them cook for a few minutes to settle into the stew.
If you want to adjust any of the seasonings, now’s the time. I’m fairly conservative in the amount of chili powder and cayenne I call for up front, since they can vary a lot in potency. If you want a stronger chili flavor or more heat, this is when you’ll want to add more to the chili, getting it right where you want it.
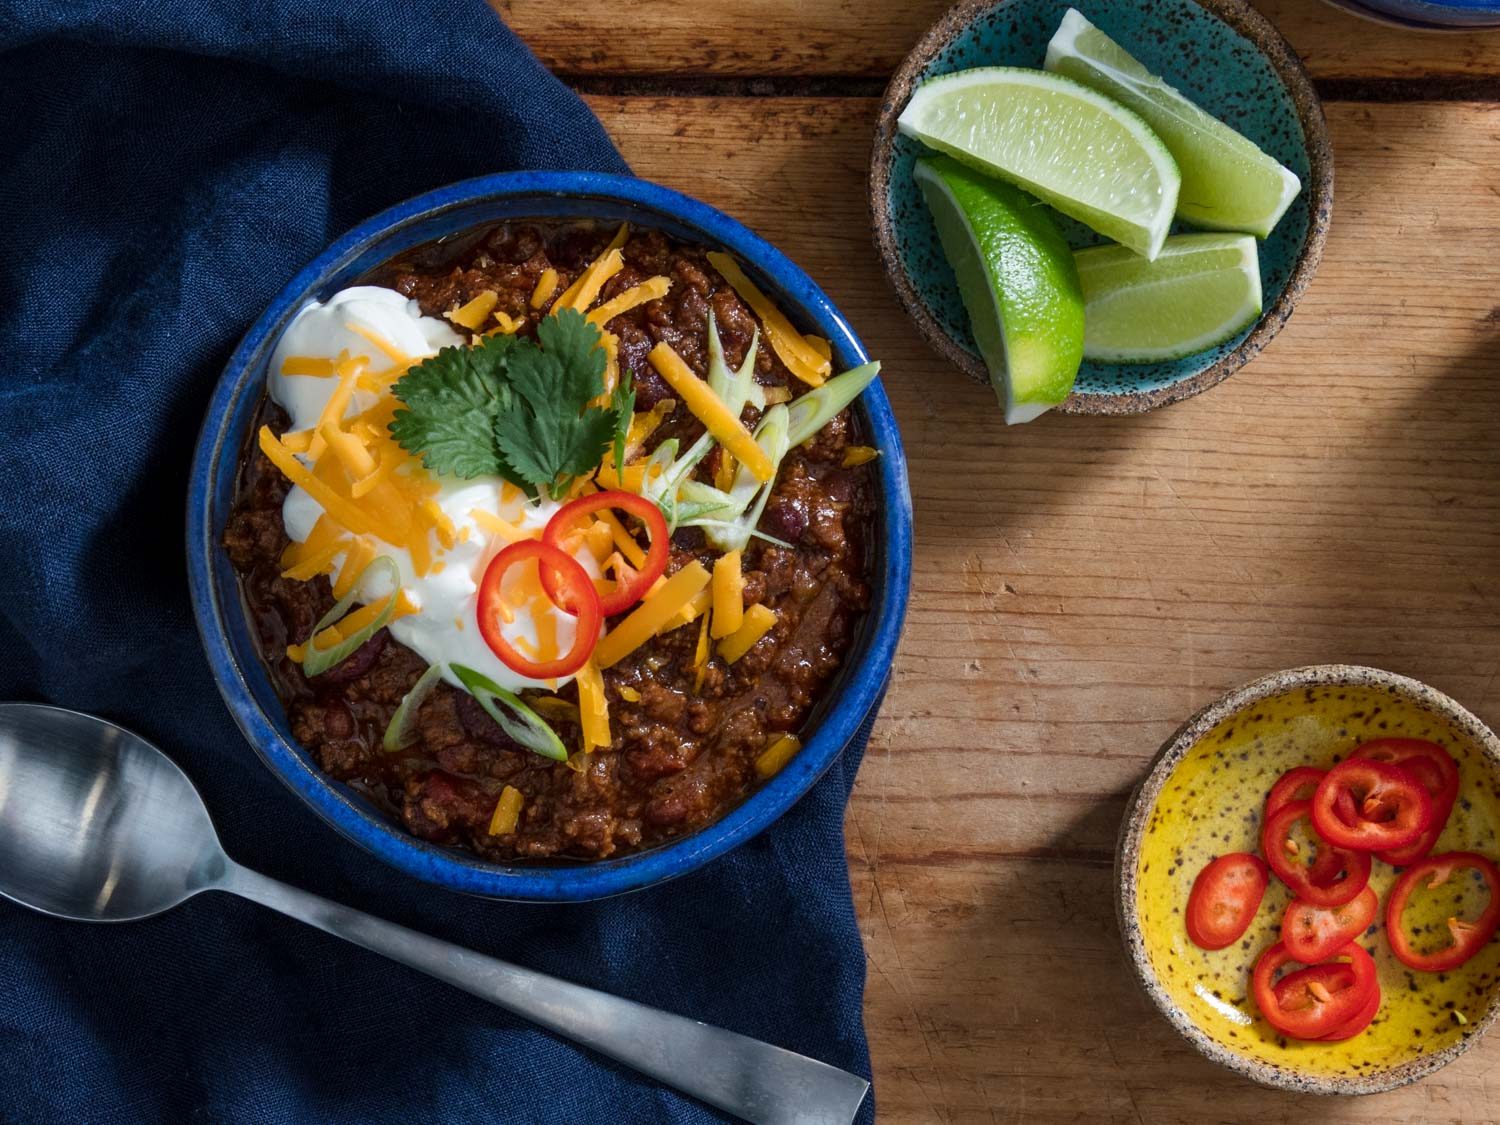
This is exactly the kind of chili you want to put on hot dogs or nachos, or scoop into bowls and top with whatever it is that you require—shredded cheese, lime, cilantro, chili peppers, sour cream, and so forth. For me, that’s a bit of everything.
I have one final tip, which I learned while lazily putting away my leftovers during testing, scooping all my samples into one big container. The answer to the ground-versus-chunks debate: both.
This post may contain links to Amazon or other partners; your purchases via these links can benefit Serious Eats. Read more about our affiliate linking policy.
Source link